
안녕하세요. 오늘은 타임리프를 알아보고 예제를 만들어 사용해보겠습니다.
전체 코드는 https://github.com/DevDotUng/Thymeleaf 에서 확인할 수 있습니다.
GitHub - DevDotUng/Thymeleaf: [Spring boot] Thymeleaf 예제
[Spring boot] Thymeleaf 예제. Contribute to DevDotUng/Thymeleaf development by creating an account on GitHub.
github.com
1. Thymeleaf란?
타임리프는 웹과 독립 실행형 환경을 위한 모던 서버 사이드 자바 템플릿 엔진입니다.
타임리프를 사용해 서버에서 HTML을 동적으로 렌더링할 수 있습니다.
타임리프는 순수 HTML을 유지하려는 특징을 가집니다. 웹 브라우저에서 '우클릭 > 페이지 소스 보기' 를 통해 다음과 같이 서버 사이드에서 렌더링되어 동적으로 변경된 소스를 확인할 수 있습니다.

2. Thymeleaf 사용법
타임리프는 주로 HTML 태그에 th:xxx 속성을 지정하는 방식으로 동작합니다.
| 표현 | 기능 | 예 |
| ${} | 변수 | ${title} |
| th:each | 반복 출력 | <tr th:each="dog : ${dogs}"> <td th:text="${dog.name}"></td> </tr> |
| @{} | URL 링크 표현식 | th:href="@{/thymeleaf/second}" |
이제 직접 사용해보겠습니다.
3. Thymeleaf 사용 준비
- build.gradle을 설정해줍니다.
implementation 'org.springframework.boot:spring-boot-starter-thymeleaf'
- application.properties에 옵션을 설정해줍니다.
spring.thymeleaf.prefix=classpath:/templates/
spring.thymeleaf.suffix=.html
- resources 디렉토리 내에 templates 디렉토리를 만들고 html 파일을 만들어줍니다.

- HTML 태그를 다음과 같이 수정해줍니다.
<html xmlns:th="http://www.thymeleaf.org">4. Controller 작성
- ThymeleafController.java
package com.thymeleaf.controller;

import com.thymeleaf.entity.Dog;
import com.thymeleaf.entity.Title;
import org.springframework.stereotype.Controller;
import org.springframework.ui.Model;
import org.springframework.web.bind.annotation.GetMapping;
import org.springframework.web.bind.annotation.RequestMapping;

import java.util.ArrayList;
import java.util.List;

@Controller
@RequestMapping("/thymeleaf")
public class ThymeleafController {

    @GetMapping("")
    public String thymeleaf(Model model) {

        Title title = new Title("색깔 제목", "red");

        List<Dog> dogs = new ArrayList<>();
        dogs.add(new Dog("초코", "https://images.unsplash.com/photo-1543466835-00a7907e9de1?w=900&auto=format&fit=crop&q=60&ixlib=rb-4.0.3&ixid=M3wxMjA3fDB8MHxzZWFyY2h8N3x8ZG9nfGVufDB8fDB8fHww"));
        dogs.add(new Dog("알루", "https://images.unsplash.com/photo-1588943211346-0908a1fb0b01?w=900&auto=format&fit=crop&q=60&ixlib=rb-4.0.3&ixid=M3wxMjA3fDB8MHxzZWFyY2h8MTJ8fGRvZ3xlbnwwfHwwfHx8MA%3D%3D"));
        dogs.add(new Dog("뭉치", "https://images.unsplash.com/photo-1583512603805-3cc6b41f3edb?w=900&auto=format&fit=crop&q=60&ixlib=rb-4.0.3&ixid=M3wxMjA3fDB8MHxzZWFyY2h8MTR8fGRvZ3xlbnwwfHwwfHx8MA%3D%3D"));

        model.addAttribute("title", "제목");
        model.addAttribute("colorTitle", title);
        model.addAttribute("dogs", dogs);

        return "thymeleaf";
    }

    @GetMapping("second")
    public String second() {

        return "second";
    }
}
Title과 Dog는 다음과 같습니다.
- Title.java
package com.thymeleaf.entity;

import lombok.AllArgsConstructor;
import lombok.Getter;

@AllArgsConstructor
@Getter
public class Title {
    private String title;
    private String color;
}
- Dog.java
package com.thymeleaf.entity;

import lombok.AllArgsConstructor;
import lombok.Getter;

@AllArgsConstructor
@Getter
public class Dog {
    private String name;
    private String image;
}
5. HTML 작성
<!DOCTYPE html>
<html xmlns:th="http://www.thymeleaf.org">
<head>
    <meta charset="UTF-8">
    <title>Thymeleaf</title>
</head>
<body>
    <h1 th:text="${title}"></h1>
    <h1 th:text="${colorTitle.title}" th:style="${colorTitle.color == 'red'} ? 'color:red' : 'color:black'"></h1>
    <table>
        <thead>
        <tr>
            <th>이름</th>
            <th>사진</th>
        </tr>
        </thead>
        <tbody>
        <tr th:each="dog : ${dogs}">
            <td th:text="${dog.name}"></td>
            <td>
                <img th:src="${dog.image}" style="width: 100px; height: 100px">
            </td>
        </tr>
        </tbody>
    </table>
    <a th:href="@{/thymeleaf/second}">Go Second Page</a>
</body>
</html>
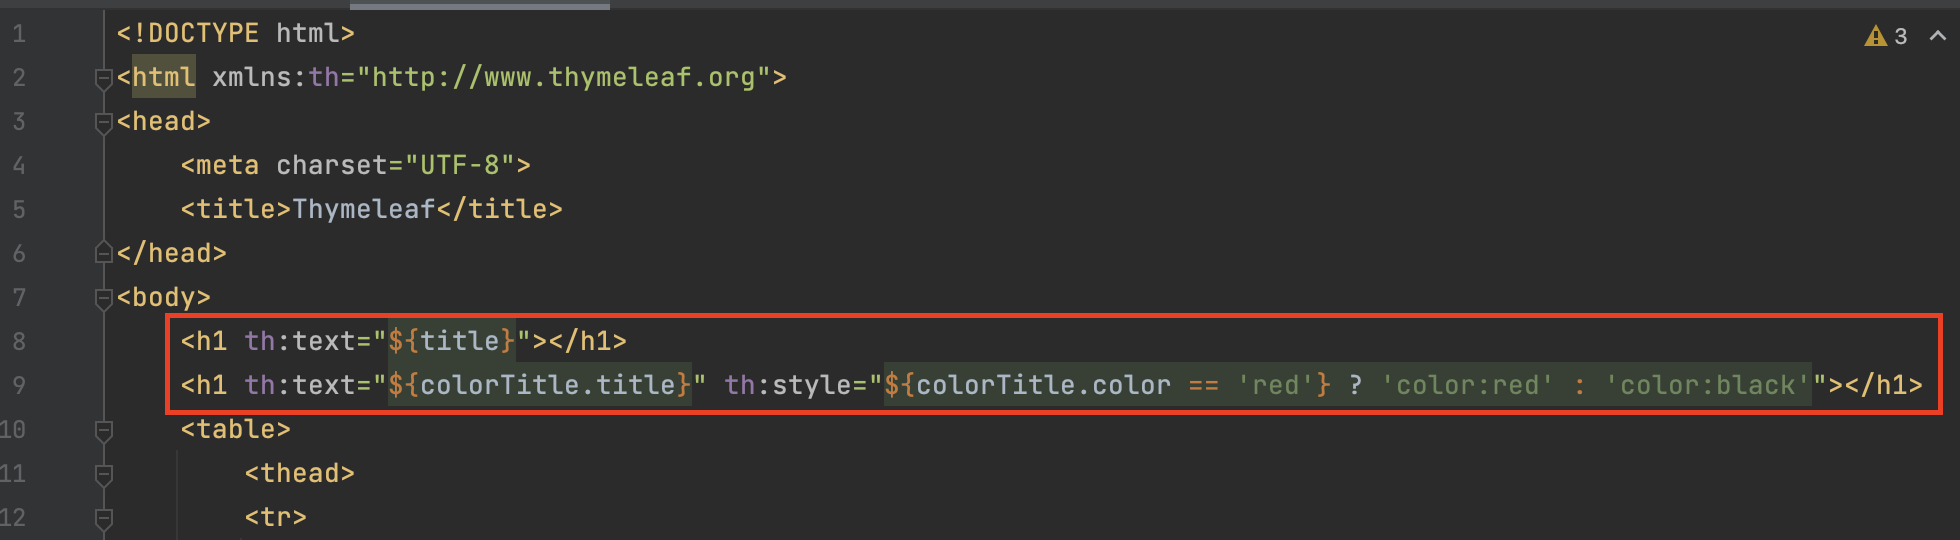
- 변수 사용 (String 자료형)
<h1 th:text="${title}"></h1>${변수명} 형태로 사용하면 됩니다.
- 변수 사용 (Object) 및 style 속성 활용
<h1 th:text="${colorTitle.title}" th:style="${colorTitle.color == 'red'} ? 'color:red' : 'color:black'"></h1>colorTitle.title으로도 사용 가능하고 colorTitle.getTitle() 형태로도 사용이 가능합니다. (Getter 어노테이션을 추가해주어야합니다.)
style 속성은 위와 같이 사용 가능합니다.
- 반복 출력
<tr th:each="dog : ${dogs}">
    <td th:text="${dog.name}"></td>
</tr>java의 for each문 형태와 비슷하다고 생각하면 됩니다. dog가 객체이므로 dog.name 형태로 사용합니다.
- 이미지 출력
<img th:src="${dog.image}" style="width: 100px; height: 100px">이미지 주소를 변수로 사용해 이미지를 출력할 수 있습니다.
- URL 링크
<a th:href="@{/thymeleaf/second}">Go Second Page</a>위와 같이 사용하여 http://localhost:8080/thymeleaf/second 링크로 이동할 수 있습니다.
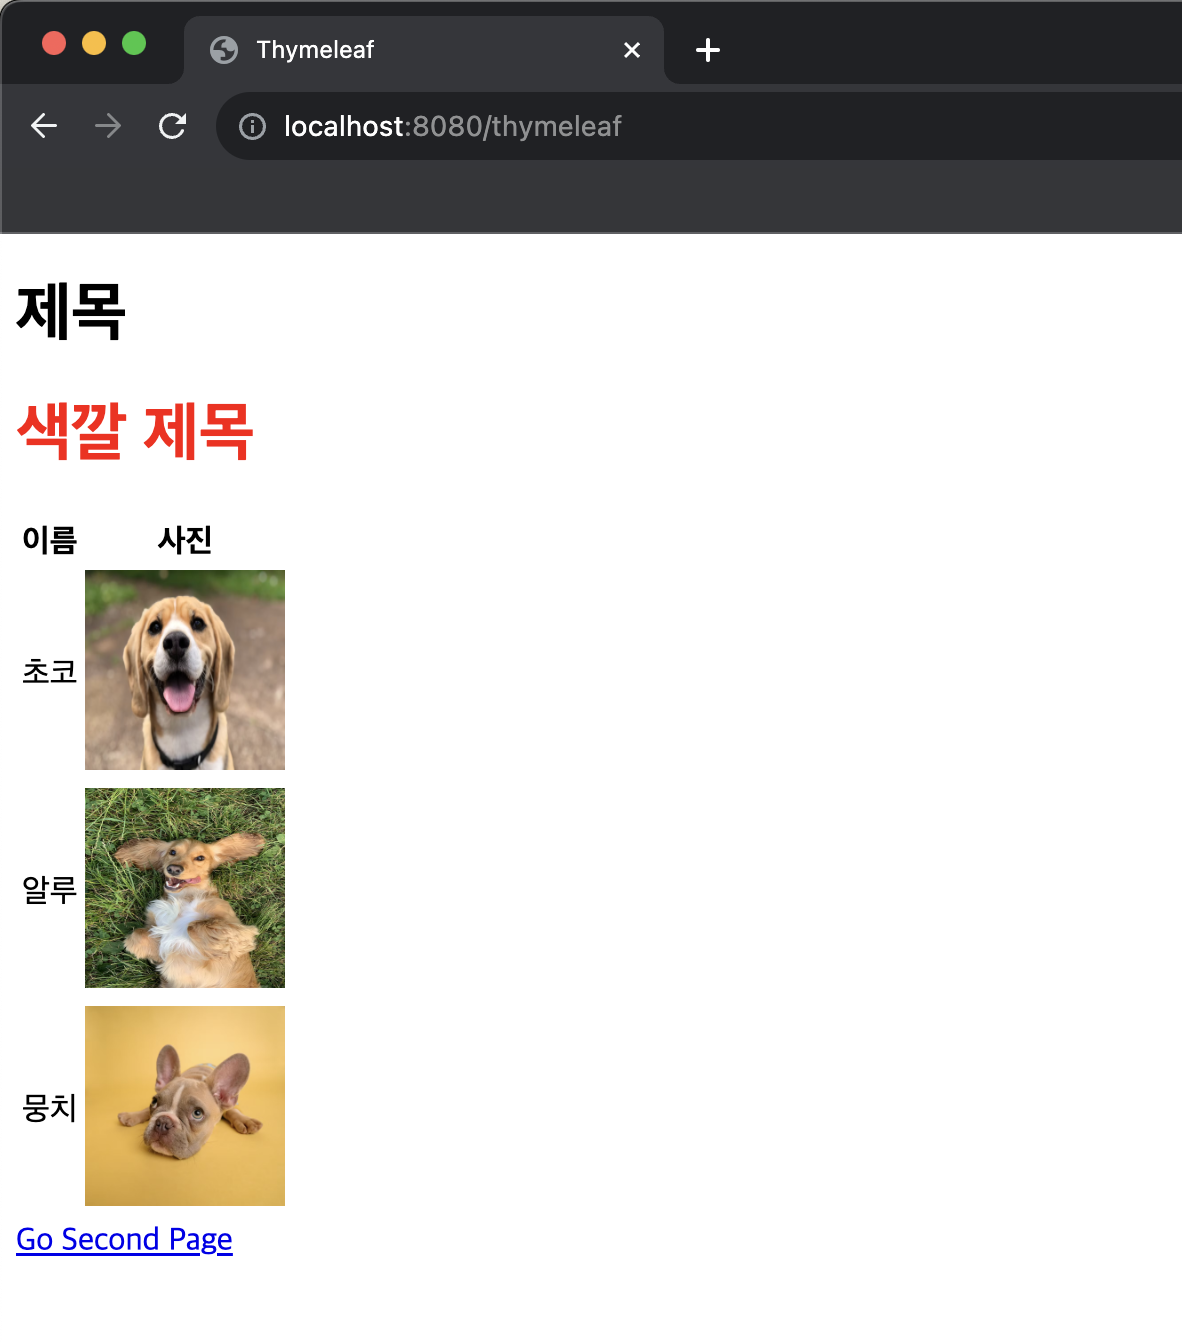
6. 결과 화면

전체 코드: https://github.com/DevDotUng/Thymeleaf
GitHub - DevDotUng/Thymeleaf: [Spring boot] Thymeleaf 예제
[Spring boot] Thymeleaf 예제. Contribute to DevDotUng/Thymeleaf development by creating an account on GitHub.
github.com
'Spring' 카테고리의 다른 글
| [SpringBoot] Gradle 프로젝트 Jar 빌드 및 실행 (Terminal, MacOS, Linux) (0) | 2024.02.26 |
|---|---|
| [SpringBoot] Log4j2를 사용하여 로깅하기 - 로그 설정 (2) | 2024.01.04 |
| [SpringBoot] POI 를 사용하여 엑셀(.xlsx) 파일 내의 이미지 추출 (0) | 2023.11.21 |
| [SpringBoot] POI 를 사용하여 엑셀(.xlsx) 파일 읽기 (0) | 2023.11.14 |
| Spring boot 프로젝트 생성 (1) | 2023.09.20 |