
Spring boot 프로젝트 시작하기
Spring | Quickstart
Spring Quickstart Guide What you'll build You will build a classic “Hello World!” endpoint which any browser can connect to. You can even tell it your name, and it will respond in a more friendly way. Step 1: Start a new Spring Boot project Use start.s
spring.io

start.spring.io를 눌러 web project를 만들어봅시다.
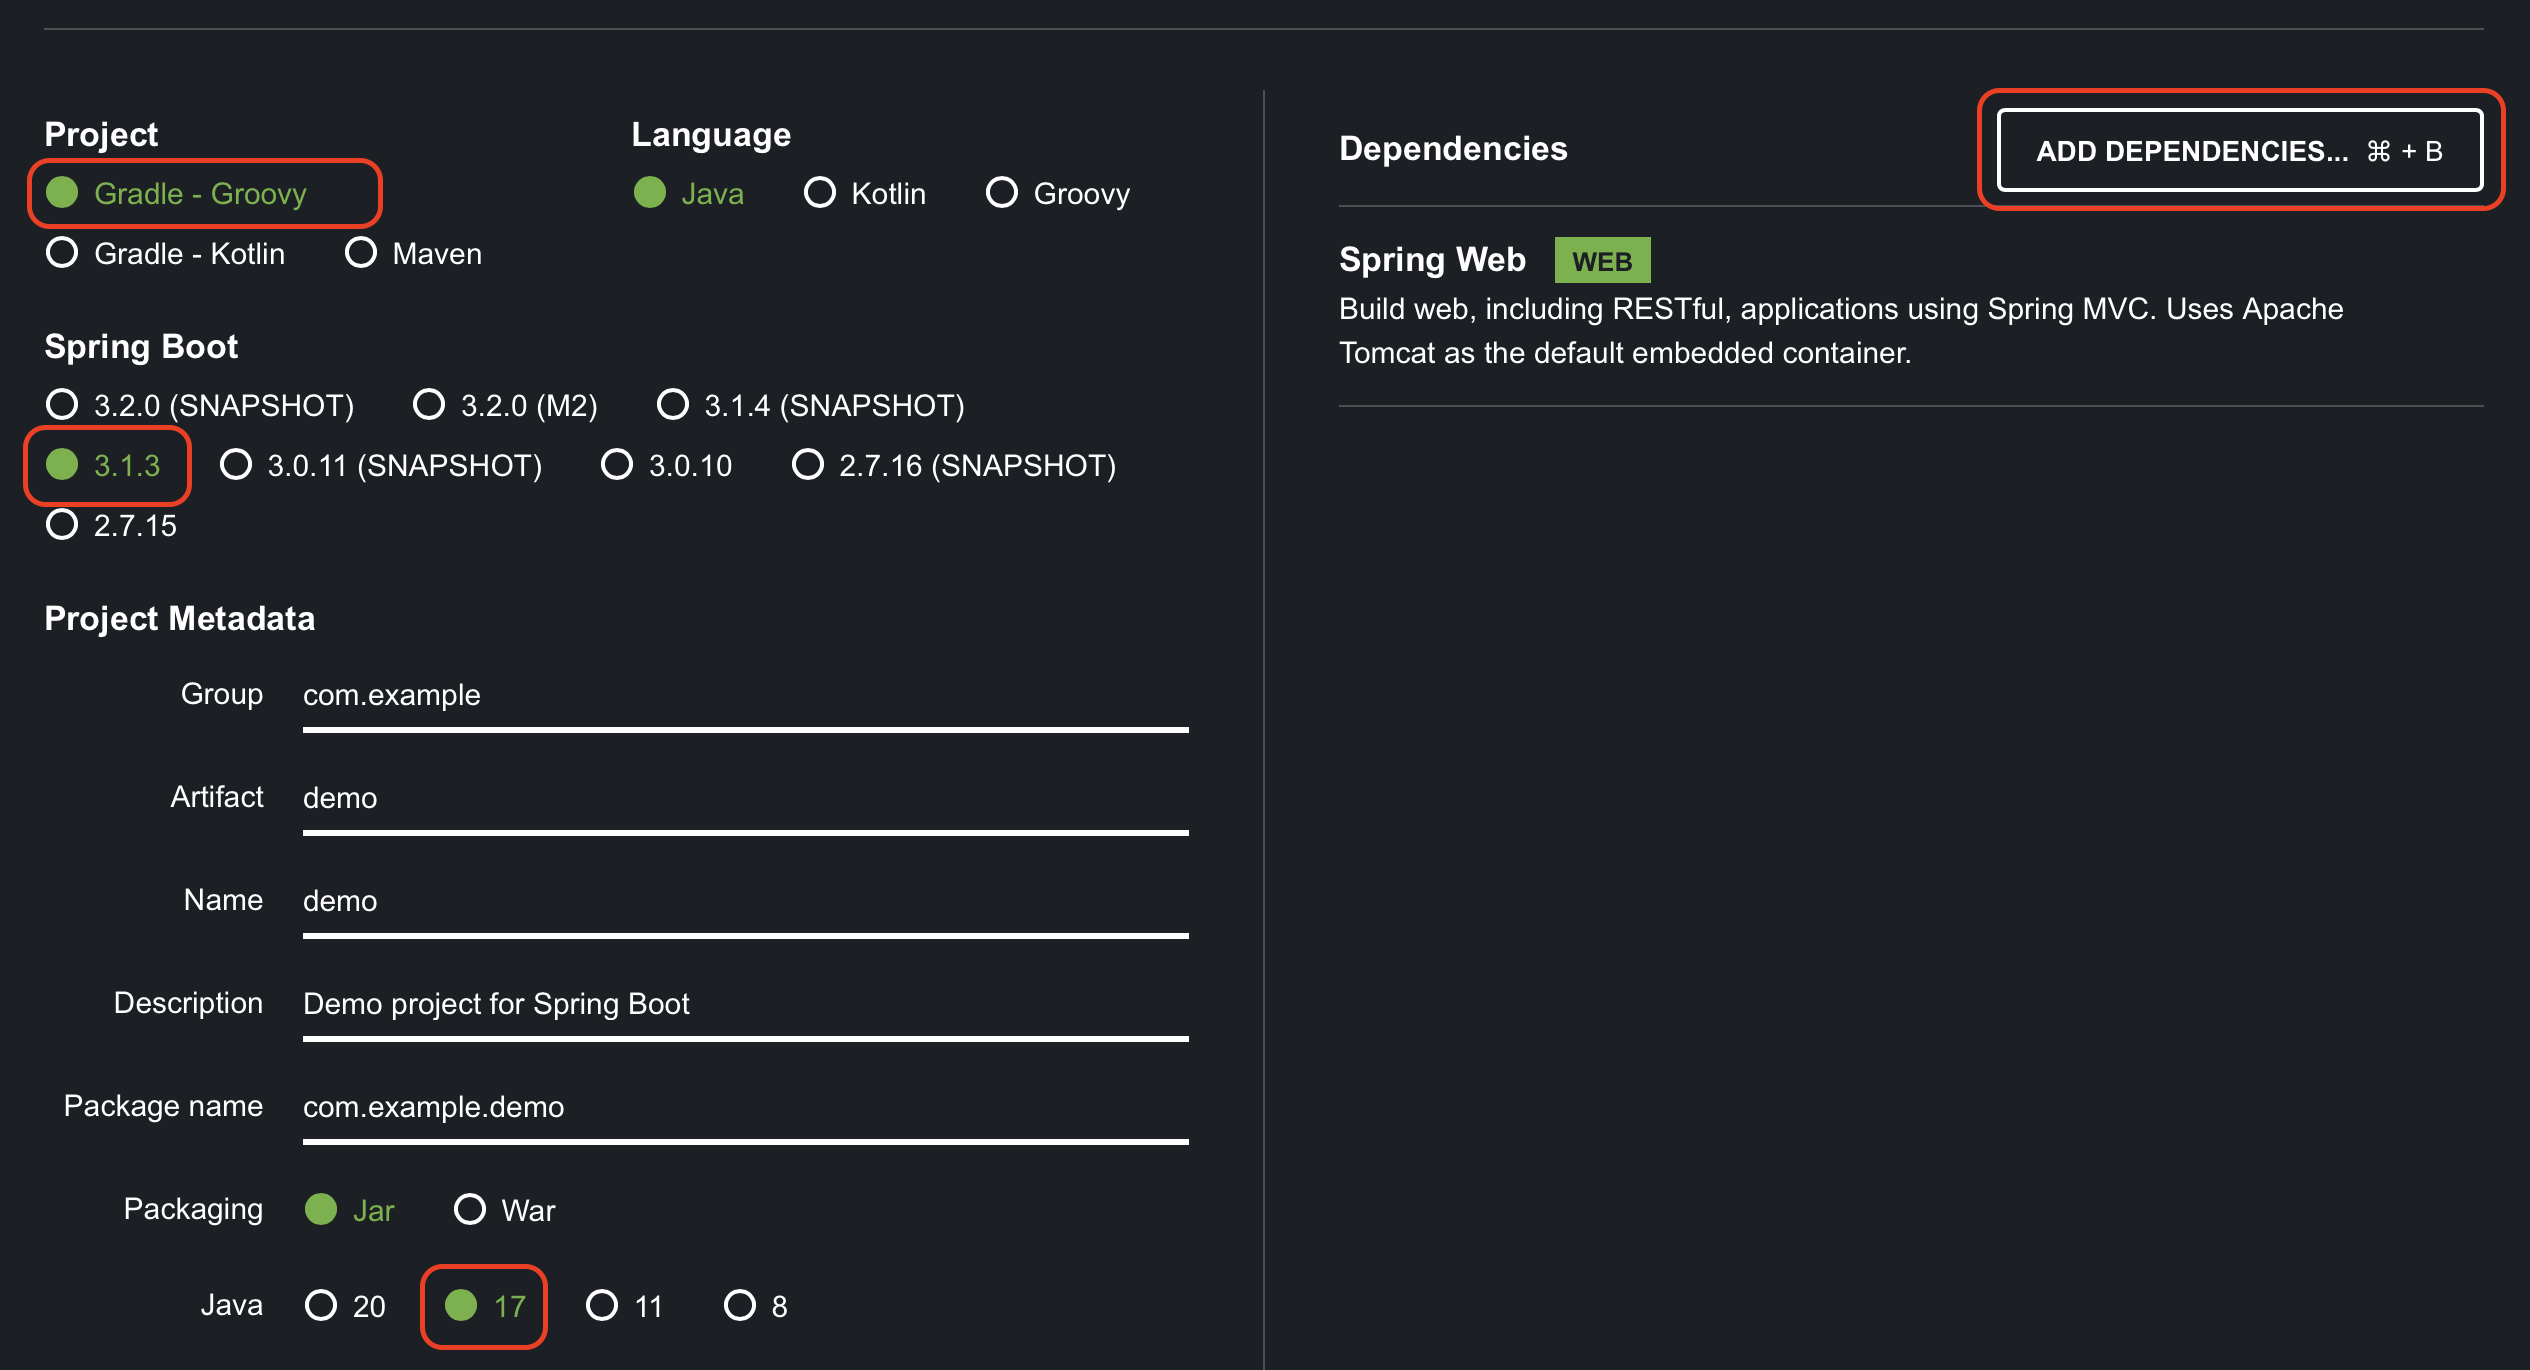
1. 빌드 툴을 선택해줍니다. 저희는 Gradle을 사용하겠습니다.
2. Spring boot 버전을 선택해줍니다.
3. Java 버전은 17을 추천하기에 17을 선택하겠습니다.

4. ADD DEPENDENCIES를 클릭하여 dependency를 추가해줍니다. 이번에는 Spring에서 제공하는 간단한 예제만 구현할 것이기 때문에 Spring Web만 추가하겠습니다.
설정이 끝났습니다. 이제 하단의 GENERATE를 눌러 프로젝트를 다운받아줍니다.

압축을 풀어주고 IntelliJ IDEA를 열어줍니다.

Open을 눌러 다운 받은 프로젝트를 열고 demo > src > main > java > com > example > demo > DemoApplication.java를 열어줍니다.
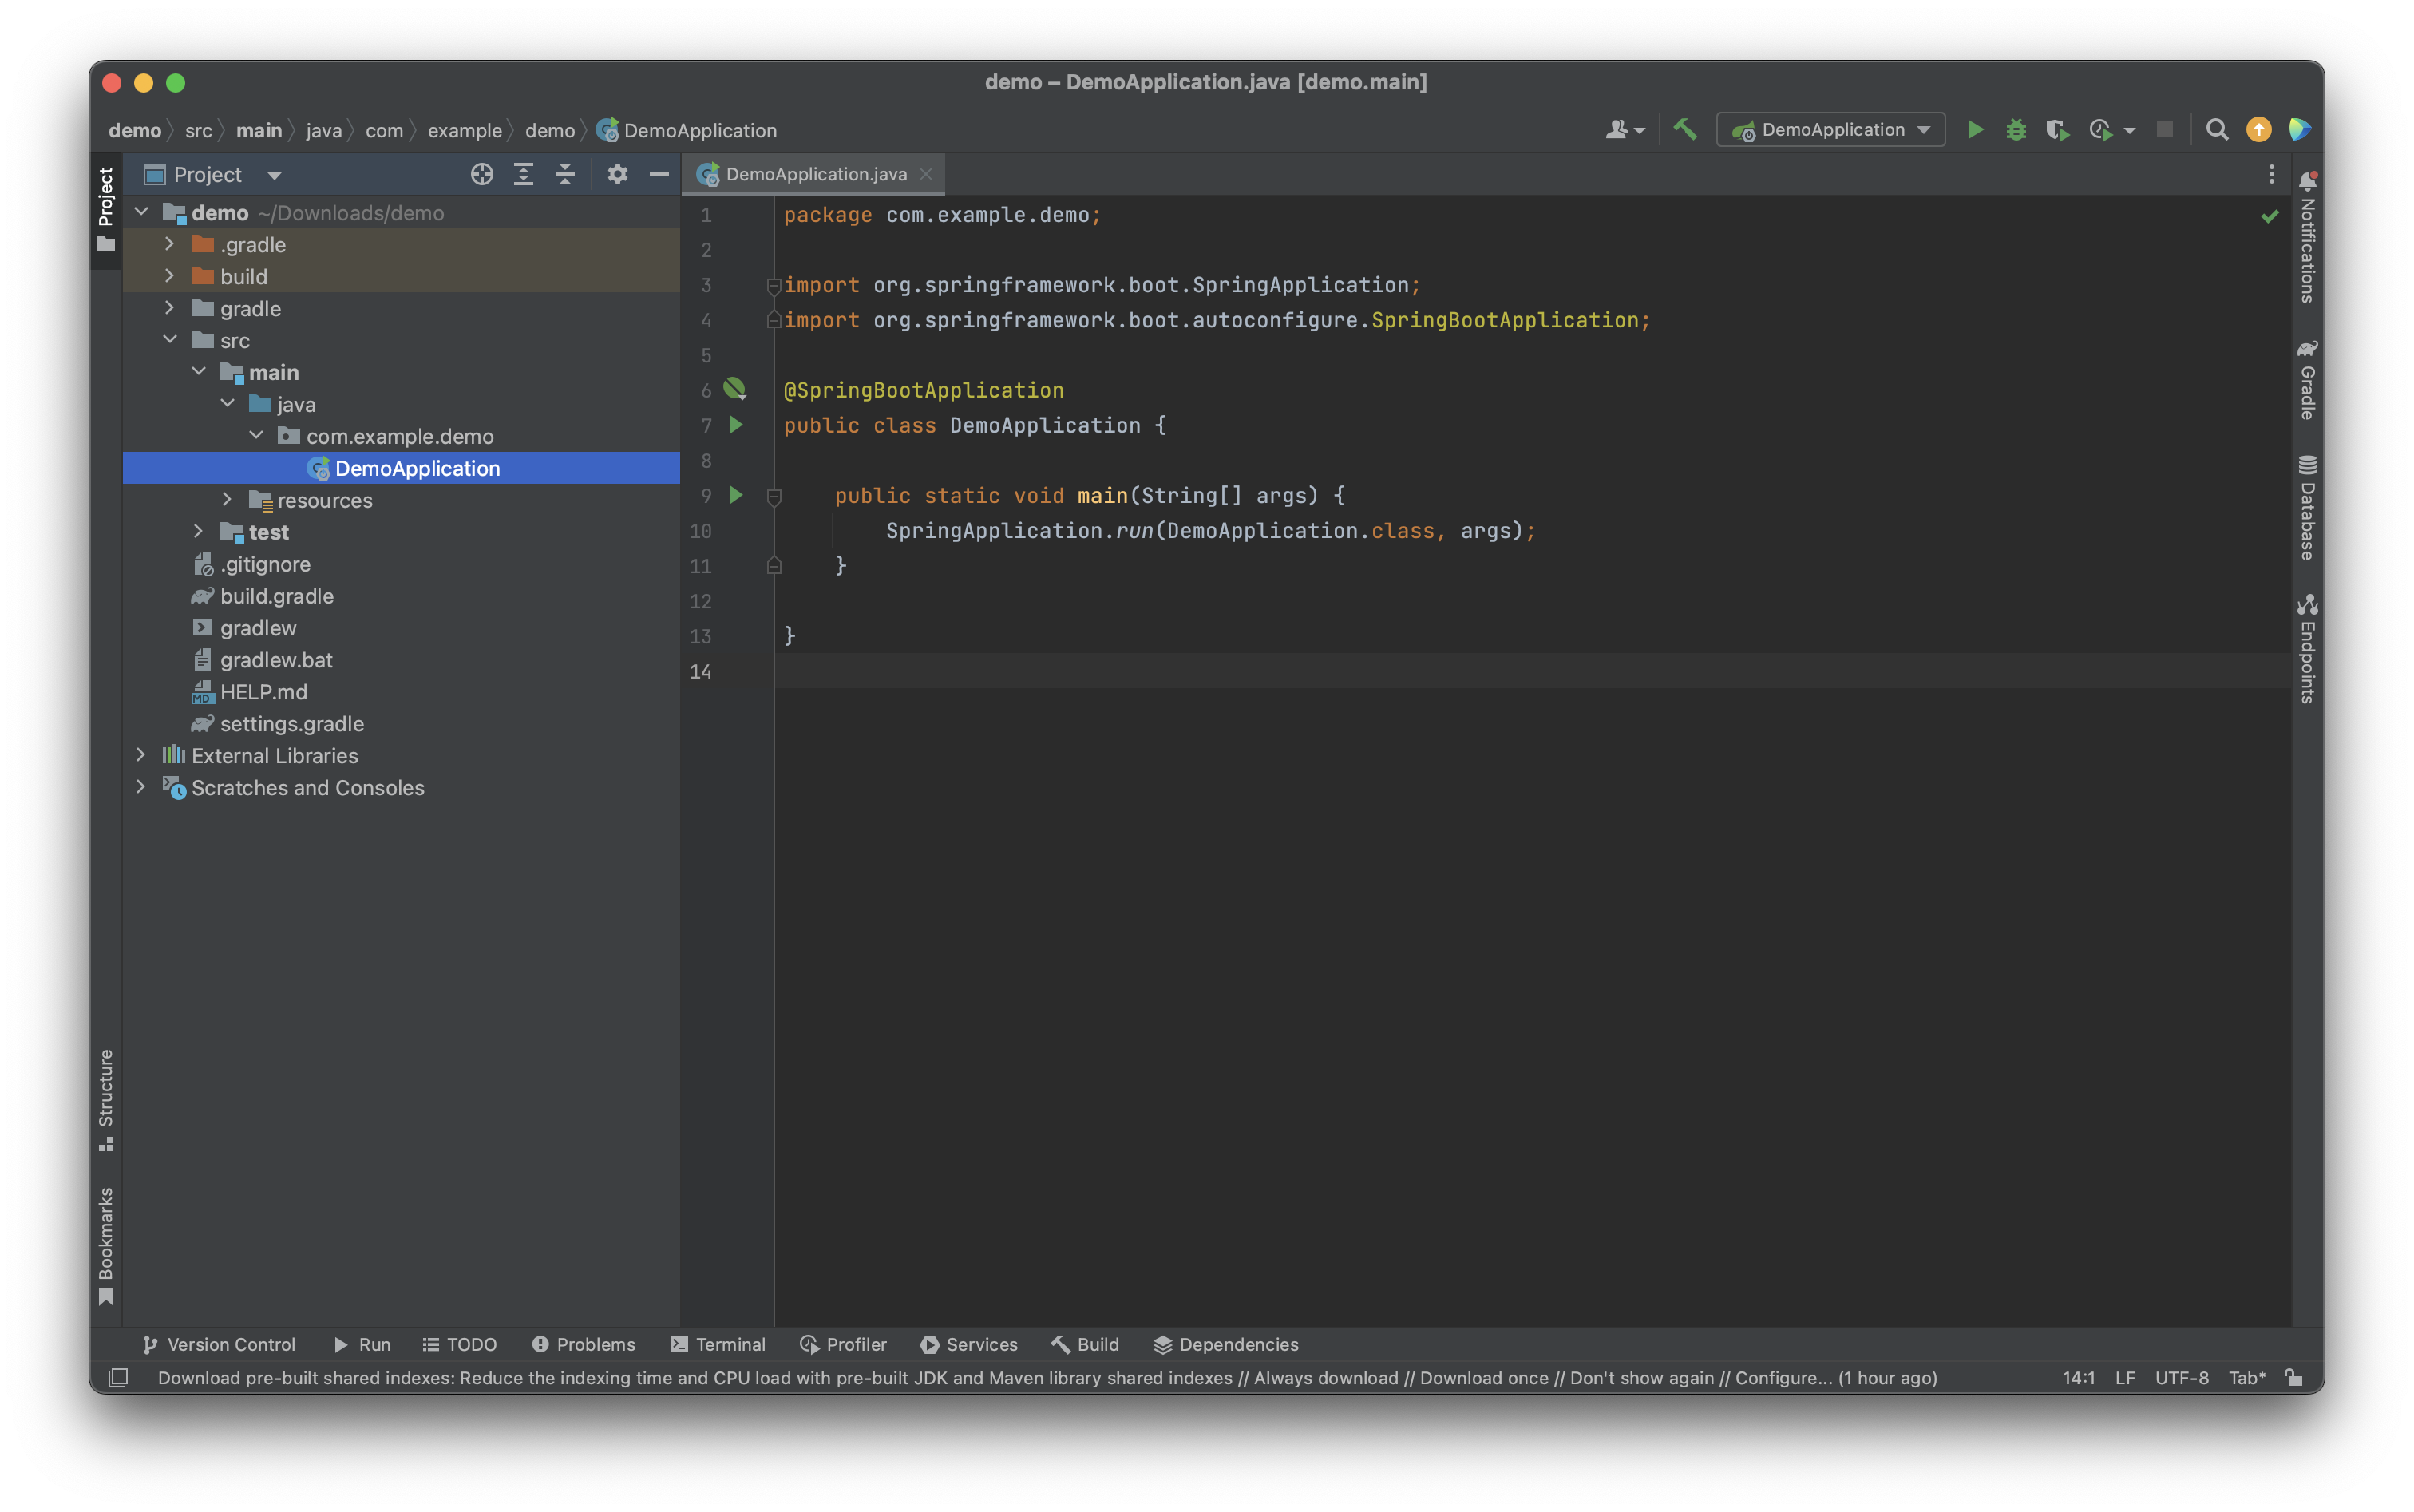
Spring에서 제공하는 샘플 코드를 입력해봅시다.
package com.example.demo;

import org.springframework.boot.SpringApplication;
import org.springframework.boot.autoconfigure.SpringBootApplication;
import org.springframework.web.bind.annotation.GetMapping;
import org.springframework.web.bind.annotation.RequestParam;
import org.springframework.web.bind.annotation.RestController;

@SpringBootApplication
@RestController
public class DemoApplication {
	public static void main(String[] args) {
		SpringApplication.run(DemoApplication.class, args);
	}
	@GetMapping("/hello")
	public String hello(@RequestParam(value = "name", defaultValue = "World") String name) {
		return String.format("Hello %s!", name);
	}
}예제 코드 입력 후 우측 상단 Run 버튼을 눌러줍니다.
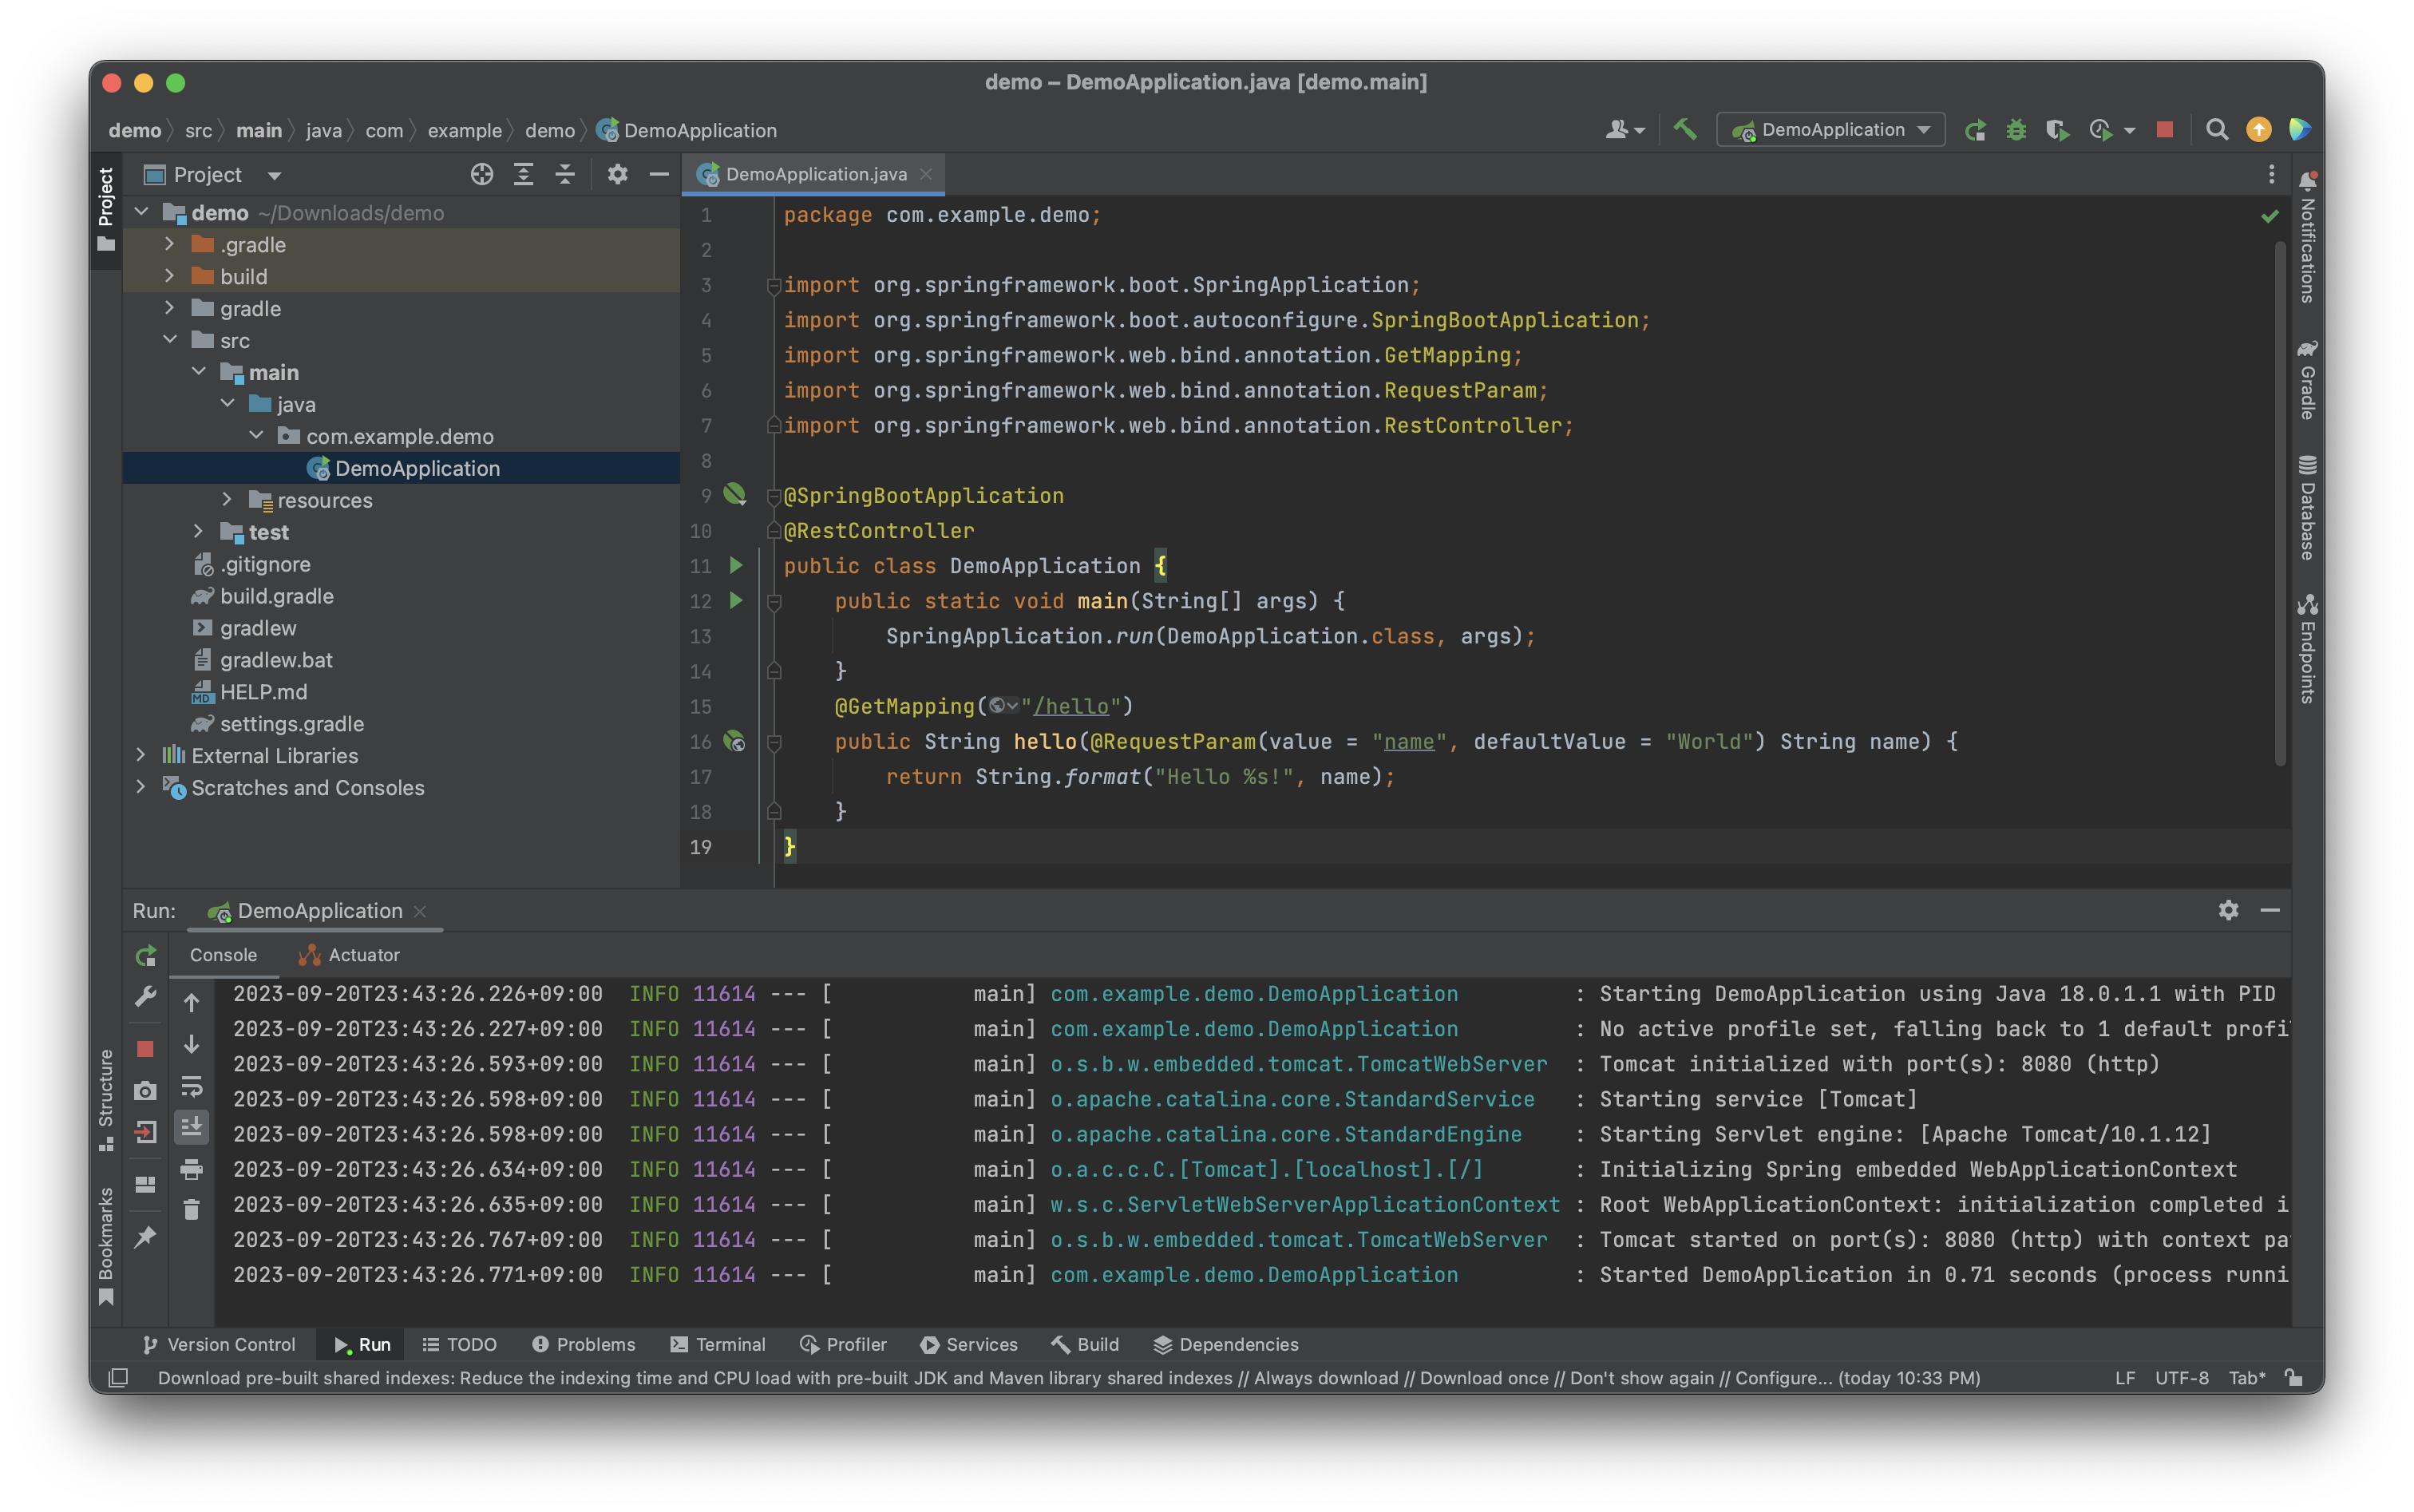
잘 실행 되었습니다. 브라우저에 localhost:8080/hello를 입력해줍니다.

응답을 잘 받았습니다. URL 뒤에 이름을 붙여줘도 잘 응답하는군요

여기까지 Spring boot 프로젝트를 생성해봤습니다. 생성된 프로젝트에서 @SpringBootApplication 어노테이션을 보았습니다. 다음 시간에는 어노테이션이 무엇인지 알아보겠습니다.
'Spring' 카테고리의 다른 글
| [SpringBoot] Gradle 프로젝트 Jar 빌드 및 실행 (Terminal, MacOS, Linux) (0) | 2024.02.26 |
|---|---|
| [SpringBoot] Log4j2를 사용하여 로깅하기 - 로그 설정 (2) | 2024.01.04 |
| [SpringBoot] Thymeleaf란? 기본 문법과 사용법 (0) | 2023.11.29 |
| [SpringBoot] POI 를 사용하여 엑셀(.xlsx) 파일 내의 이미지 추출 (0) | 2023.11.21 |
| [SpringBoot] POI 를 사용하여 엑셀(.xlsx) 파일 읽기 (0) | 2023.11.14 |