
오늘은 스프링 프로젝트와 AWS S3 버킷을 연동하여 사용하는 방법을 정리해보겠습니다.
1. AWS S3란?
AWS S3란 Simple Storage Service의 약자로, 주로 파일 서버에 이용됩니다.
- 모든 종류의 데이터를 원하는 형식으로 저장
- 저장할 수 있는 데이터의 전체 볼륨과 객체 수에는 제한이 없음
- Amazon S3는 간단한 key 기반의 객체 스토리지이며, 데이터를 저장 및 검색하는데 사용할 수 있는 고유한 객체 키를 할당.
- Amazon S3는 간편한 표준 기반 REST 웹 서비스 인터페이스를 제공
2. AWS S3를 사용하는 이유
여러가지가 있겠지만, 아래 두가지 이유가 가장 큽니다.
- 확장성(Scalability) : 파일 서버는 트래픽이 증가함에 따라 서버 인프라 및 용량 계획을 변경해야 되는데, S3가 확장 및 성능 부분을 대신 처리
- 내구성(Durability) : 여러 영역에 여러 데이터 복사본을 저장하므로 한 영역이 다운되더라도 데이터를 사용할 수 있고, 복구가 가능
3. S3 생성
1. Amazon S3 -> 버킷 -> 버킷 만들기

2. 버킷 이름 설정 후 액세스 차단 해제


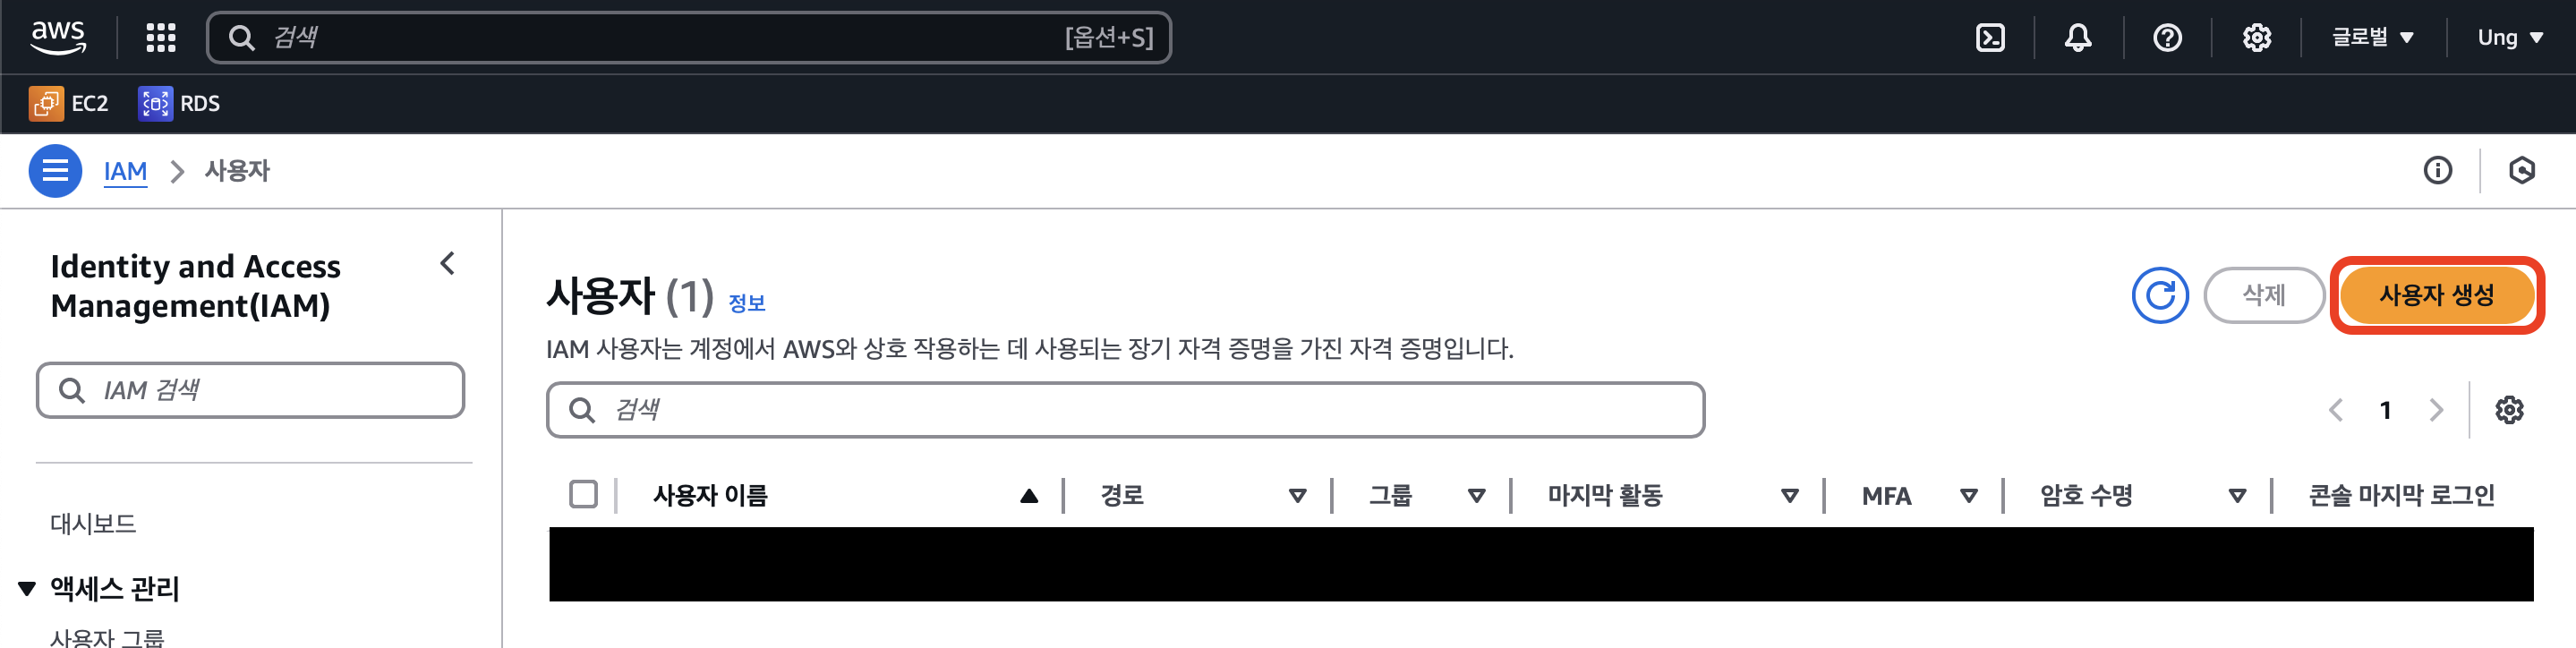
3. IAM -> 사용자 -> 사용자 생성
4. 사용자 이름 설정 후 다음

5. 직접 정책 연결 후 AmazonS3FullAccess 검색하여 선택하고 다음

6. 사용자 생성 클릭 (사용자 생성 완료)

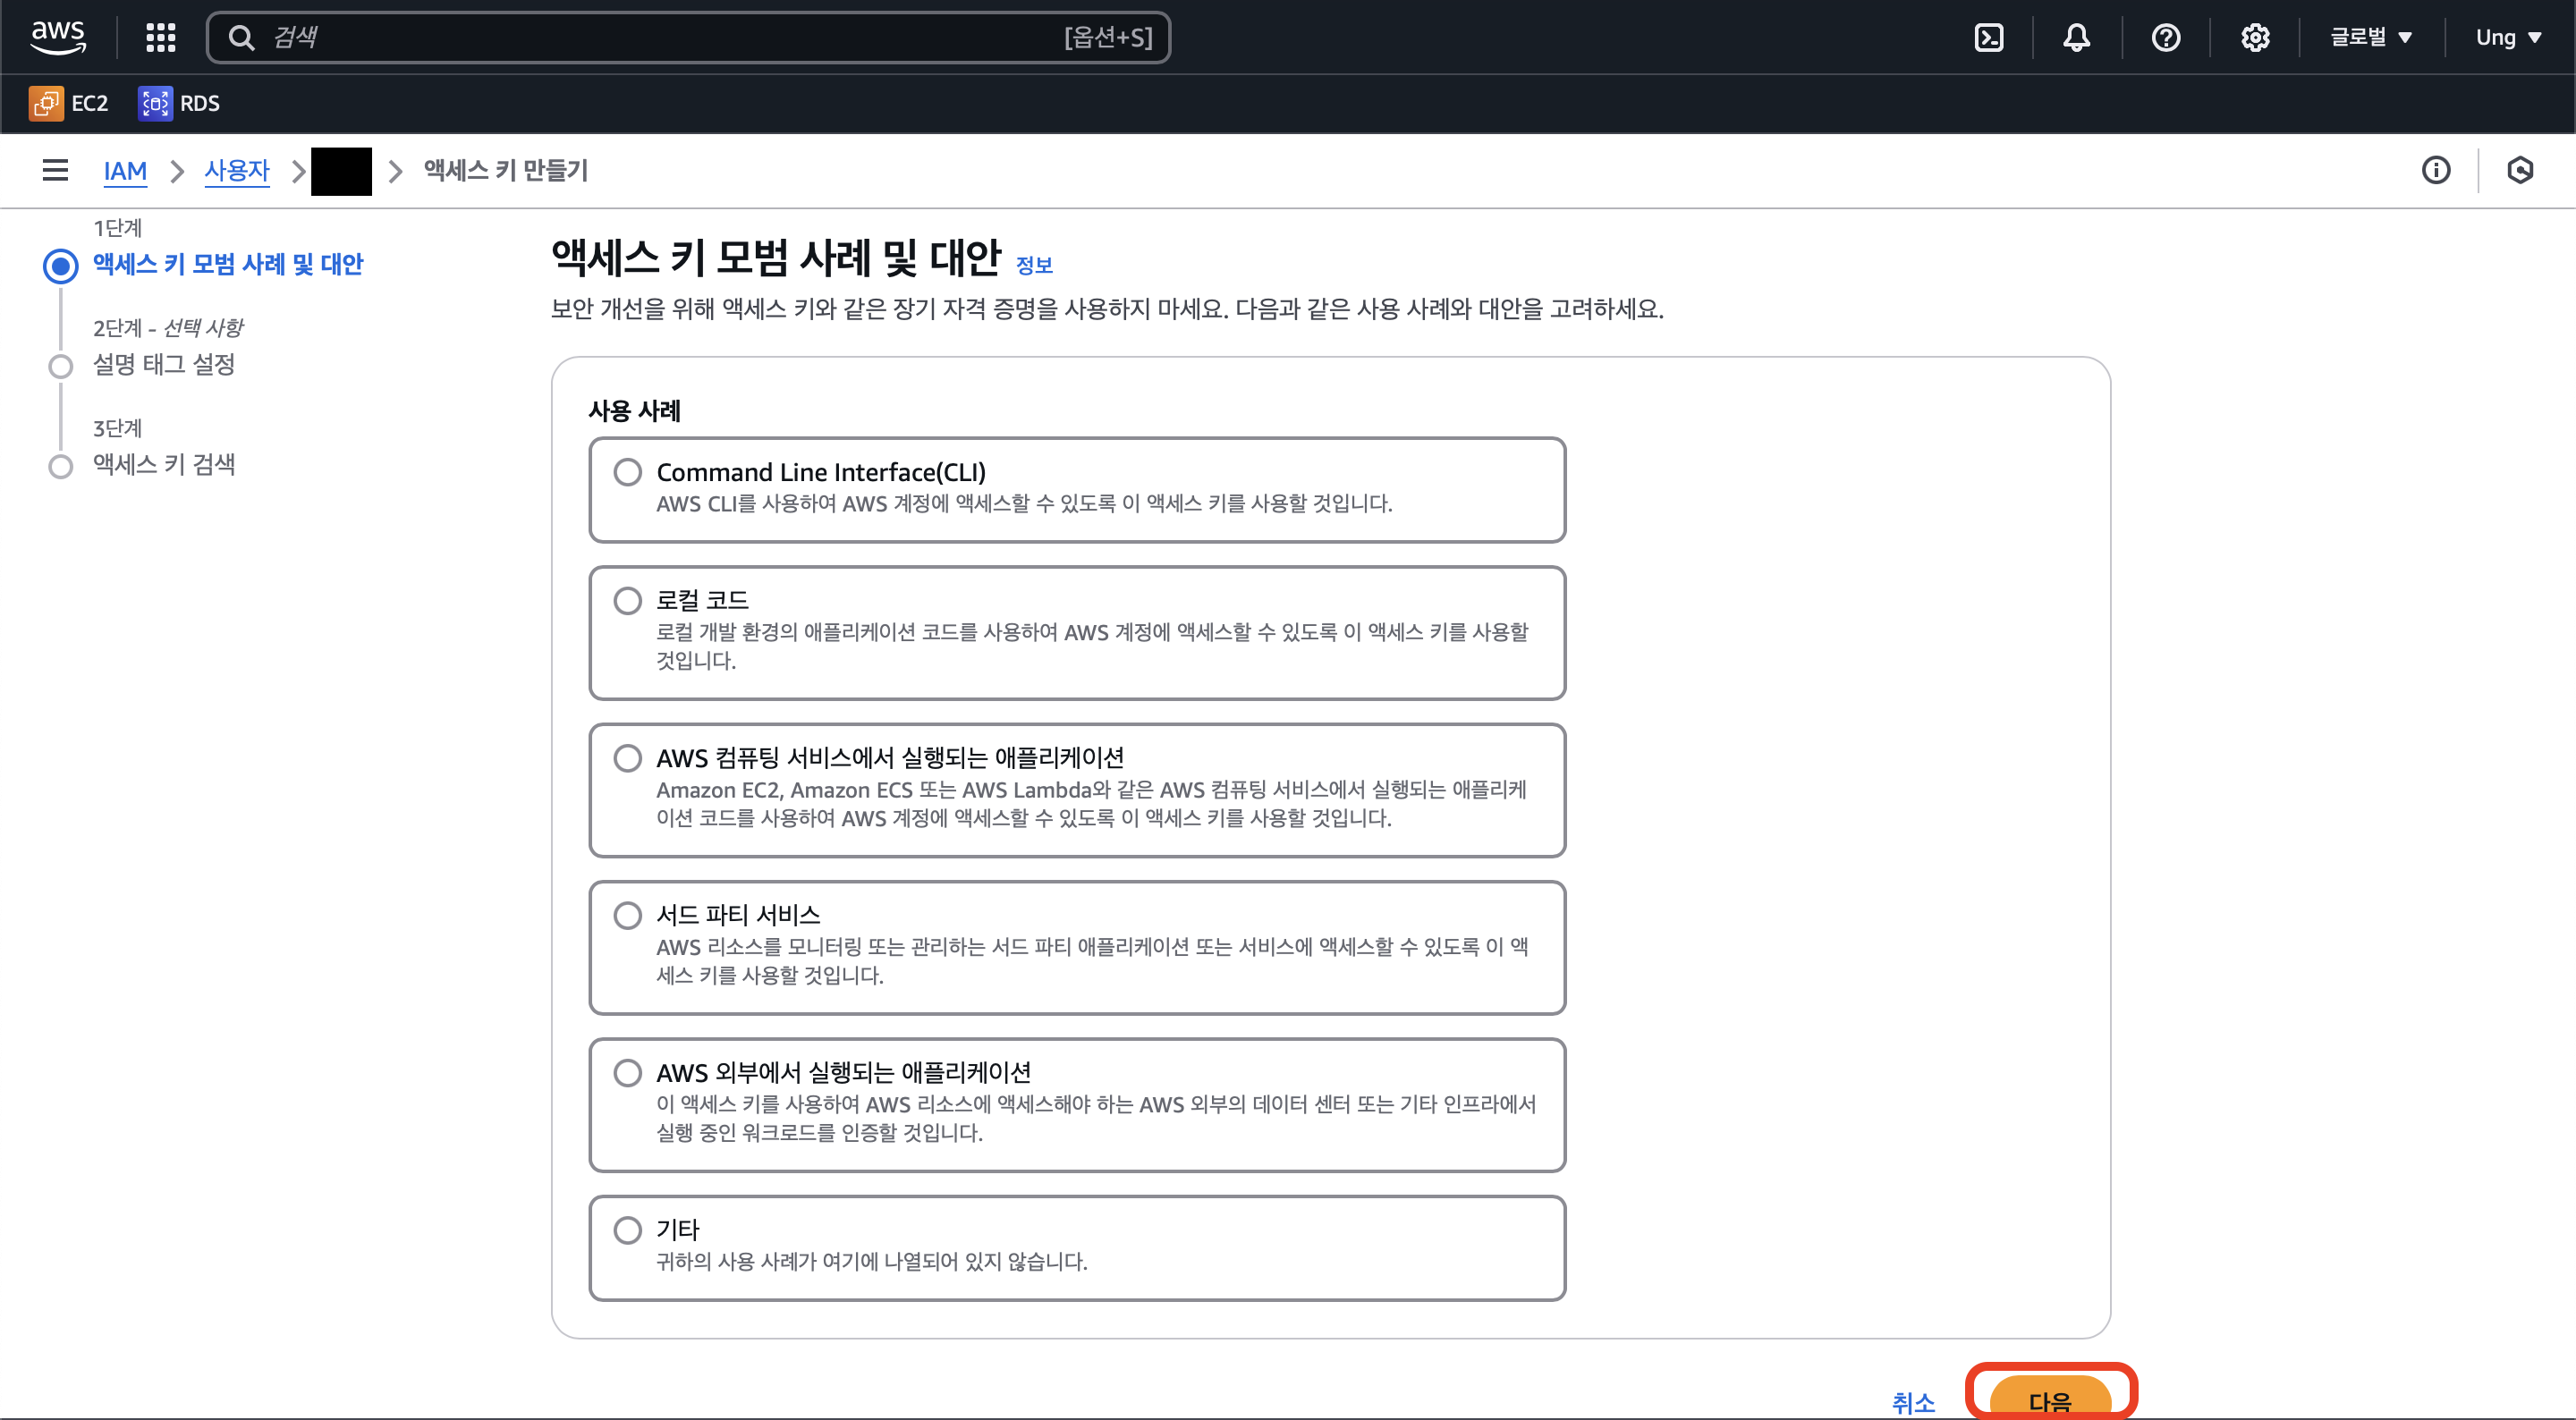
7. IAM -> 사용자 -> 이름 클릭 -> 보안 자격 증명 -> 액세스 키 만들기

8. 아무거나 클릭 후 다음
9. 태그 설정 후 액세스 키 만들기 클릭

10. 액세스 키와 비밀 액세스 키를 확인할 수 있습니다.
페이지를 나가면 액세스 키를 확인할 수 없으니 꼭! .csv 파일로 다운로드 하시길 권장합니다.

4. Spring 연동
1. 의존성 추가
- build.gradle
implementation 'org.springframework.cloud:spring-cloud-starter-aws:2.2.6.RELEASE'
2. 설정 정보 추가
- application.yml
cloud:
  aws:
    s3:
      bucket: [버킷 이름]
    stack.auto: false
    region.static: ap-northeast-2
    credentials:
      accessKey: [액세스 키]
secretKey: [비밀 액세스 키]- application.properties의 경우
cloud.aws.s3.bucket=[버킷 이름]
cloud.aws.stack.auto=false
cloud.aws.region.static=ap-northeast-2
cloud.aws.credentials.accessKey=[액세스 키]
cloud.aws.credentials.secretKey=[비밀 액세스 키]accessKey와 secretKey는 노출 시 해킹으로 인한 과금의 위험이 있습니다.
꼭 설정 파일을 .gitignore에 포함시켜 깃허브에 업로드하지 않도록 합시다!
3. Spring Configuration 설정
- S3Config.java
@Configuration
public class S3Config {
    @Value("${cloud.aws.credentials.access-key}")
    private String accessKey;
    @Value("${cloud.aws.credentials.secret-key}")
    private String secretKey;
    @Value("${cloud.aws.region.static}")
    private String region;

    @Bean
    public AmazonS3Client amazonS3Client() {
        BasicAWSCredentials awsCredentials= new BasicAWSCredentials(accessKey, secretKey);
        return (AmazonS3Client) AmazonS3ClientBuilder.standard()
                .withRegion(region)
                .withCredentials(new AWSStaticCredentialsProvider(awsCredentials))
                .build();
    }
}
4. Controller 생성
- S3Controller.java
@RestController
@RequestMapping("/s3")
@RequiredArgsConstructor
public class S3Controller {

    @Autowired
    private AmazonS3Client amazonS3Client;

    @Value("${cloud.aws.s3.bucket}")
    private String bucket;

    @PostMapping("/upload")
    public ResponseEntity<String> uploadMultipartFile(@RequestParam("file") MultipartFile file) {
        try {
            String fileName = file.getOriginalFilename();
            String fileUrl = "https://" + bucket + "/test/" +fileName;
            ObjectMetadata metadata = new ObjectMetadata();
            metadata.setContentType(file.getContentType());
            metadata.setContentLength(file.getSize());
            amazonS3Client.putObject(bucket,fileName,file.getInputStream(),metadata);

            return ResponseEntity.ok(fileUrl);
        } catch (IOException e) {
            e.printStackTrace();
            return ResponseEntity.status(HttpStatus.INTERNAL_SERVER_ERROR).build();
        }
    }

    @GetMapping("/delete")
    public ResponseEntity<String> deleteFile(@RequestParam("image") String image){
        try {
            if (amazonS3Client.doesObjectExist(bucket, image)) {
                amazonS3Client.deleteObject(bucket, image);
                return ResponseEntity.ok(image);
            } else {
                return ResponseEntity.status(HttpStatus.INTERNAL_SERVER_ERROR).build();
            }
        } catch (Exception e) {
            e.printStackTrace();
            return ResponseEntity.status(HttpStatus.INTERNAL_SERVER_ERROR).build();
        }
    }
}
5. 결과
Postman으로 Post 요청을 보냅니다.
Body 유형 : form-data
Key 속성 : file

다음과 같이 200 응답이 옵니다.
Amazon S3 -> 버킷에서 객체가 잘 추가된 것도 확인할 수 있습니다.

'Spring' 카테고리의 다른 글
| [SpringBoot] Gradle 프로젝트 Jar 빌드 및 실행 (Terminal, MacOS, Linux) (0) | 2024.02.26 |
|---|---|
| [SpringBoot] Log4j2를 사용하여 로깅하기 - 로그 설정 (2) | 2024.01.04 |
| [SpringBoot] Thymeleaf란? 기본 문법과 사용법 (0) | 2023.11.29 |
| [SpringBoot] POI 를 사용하여 엑셀(.xlsx) 파일 내의 이미지 추출 (0) | 2023.11.21 |
| [SpringBoot] POI 를 사용하여 엑셀(.xlsx) 파일 읽기 (0) | 2023.11.14 |